Wired Internet connection is considered more reliable than switching devices via Wi-Fi. Twisted pair stably transmits a signal, despite the distances and interference, which are often critical for a wireless network.
Sometimes you need to lengthen or repair the Internet cable, and there is no time to wait for the arrival of the master. Agree, in this case, the ability to increase the network cable yourself is useful.
We suggest figuring out how to connect a twisted pair cable to each other, which method is the most reliable, and which method is suitable as a temporary solution.
Reasons to build a twisted pair
The most likely reason to increase the length of the network cable is to transfer the laptop or stationary PC to the far room.
At a great distance in an apartment with reinforced concrete walls and ceilings, the signal weakens, and it becomes problematic to take lessons or prepare a project.

You can reduce the distance from the router to the computer, if you rearrange the router, but then you still have to increase another cable leading from the landing to the apartment
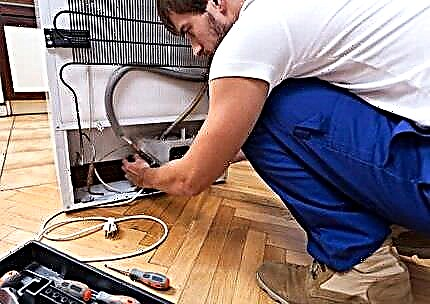
The second reason is related to repair. If the twisted pair is not sewn under a drywall or in the baseboard, but lies on the floor, not protected by anything, then it is easy to damage it. This can be done with a chair leg or a door.
Often, small children or animals “help” break the cable - the former by chance, and the latter for some reason are very fond of gnawing unattended, unattended cords.

For repair, it is necessary to cut off the damaged area and make the connection using one of the methods listed below - for example, twisting or using the RG-45 connector
Thrifty owners of computer equipment do not buy long cables if you have a few short cables at hand. Some manage to assemble an almost 6-meter functioning cable from 3 two-meter segments.
Internet wire connection methods
Consider 4 methods that can be called household. Some of them require the use of a special tool, others are performed almost manually. If all four instructions seem complicated to you, you can just go to the store and purchase a patch cord of the required length.
Option # 1 - twisting wires
If you have ever dealt with electric wires, then you understand what twisting is. This compound lived for one purpose by twisting followed by isolation.
Twisting is used to distribute wires in junction boxes, when connecting switches and sockets, to connect a broken electrical circuit.

Twisted pair twisting technology follows the same rules: a 4-wire or 8-wire cable is disassembled into cores, and then the same wires are connected to each other
Of course, such a connection cannot be called effective, since negative consequences in the form of signal attenuation are possible. However, the wire will still remain operational and will fit for at least temporary use.
For work, we recommend preparing:
- a knife, scissors or a special tool for removing the braid;
- stripper for stripping veins;
- tin solder 0.3-0.5 mm;
- heat shrink 1.5 mm (after heating - 0.75 mm);
- Matches
- electrical tape.
Step-by-step instructions for twisting twisted pair:
Image Gallery
Photo from
Step 1 - Removing External Insulation
Step 2 - disassembling conductors and stripping conductors
Step 3 - twist the veins of the same color
Step 4 - Trimming the Tips
Step 6 - heating the twisted ends with fire
Step 7 - Heat Shrink Insulation
If everything is done carefully, the shape of the cable will hardly change. Due to this, it can be pulled into the wall hole or closed into the baseboard.
But at the first opportunity, we recommend replacing the “reanimated” twisted pair cable with a prefabricated solid wire. This is necessary both for safety and to ensure a stable signal.
Option # 2 - soldering
Ordinary Internet users are unlikely to have a soldering apparatus at hand and actively use it, so we recommend that soldering twisted pairs only to people who own the equipment.
This method could not be considered, but the connections after heat treatment are indeed reliable, and the cable is workable.

To work, you will need a traditional set - a soldering iron, solder, flux, a stationery knife or a special tool for removing the braid, insulation materials - heat shrink tube, duct tape
It is more convenient to work with a modern tool - a soldering iron with a display showing the heating temperature, or a stripper - a professional knife replacement.
Separate solder with a flux is better left to professionals, for lovers a combination wire has long been produced.

Sample soldered twist. There are many nuances of working with soldering equipment, you can familiarize yourself with them on the Internet or using special literature
Instructions for soldering a network cable:
- We remove the external insulation from both cable segments. You can not cut it, but cut it along and bend it for a while, so that later it can be returned to its place.
- We disassemble the pairs of conductors, we clean them from insulation. It is better to use a stripper, as a knife or wire cutters can damage the veins.
- We twist pairs of identical conductors of both cables. They are easy to identify by the color of the insulation. We cut off the excess.
- We solder the twisted wires: heat - apply solder. We make sure that it is evenly distributed over the place of twisting. The result should be a solid, inextricable connection.
- First we make insulation of each soldered wire individually, then all together - we wrap the switching place with a dense layer of electrical tape. We make sure that there are no bare areas left.
It is not recommended that the cords connected in this way be brought out into the street or placed in rooms with high humidity.
If this is still necessary, then the repaired section of the wire should be sealed as much as possible. For protection, for example, polymer flexible hoses can be used.
Option # 3 - using a terminal
As in power electrics, in the low-current one special terminals are used for connecting wires. They can be found in online stores called “adhesive tape locks”. These are compact plastic connectors with metal contacts.

Plastic parts are solvent resistant. The internal free space of adhesive tape is filled with a gel that protects the contacts from moisture
The advantage of using terminals is that you do not need to spend time thoroughly stripping wires or wrapping the tape with electrical tape. But this is provided that the switched area will be located in the protected area - in the wall, in the box or baseboard.
Step-by-step crimping instructions:
Image Gallery
Photo from
Step 1 - remove the outer braid
Step 2 - prepare the conductors for crimping
Step 3 - install the terminal
Step 4 - crimp all the cores in turn
The finished connection resembles a garland - the terminals stick out in all directions, they cannot be compactly hidden.
But you should not worry about the tightness of the connections. Despite the appearance, the switching is reliable, and the cable will work in much the same way as a twisted analog.
Option # 4 - Twisted Pair Connector
For switching two patch cords there is a simple and affordable way even for a child - connecting a small device in the form of a box. No special names were invented for him; in network equipment stores, he is called “connector”, “connector 8P-8C”.

Adapters-adapters for lengthening Internet wires are inexpensive - 60-80 rubles. In addition to traditionally white products, red, blue and other colors are on sale, so that you can pick up the tone of the cable
However, there is one condition: to connect two segments into one, in addition to the adapter, connectors are necessary - computer plugs for switching.
That is, the connector can be used if you pre-compress the twisted pair.

Twisted-pair crimping is performed according to the direct or reverse circuit of the connection of conductors. The choice of circuit depends on the purpose of the wire. Crimping instructions can be found on the Internet.
The process of lengthening the twisted pair with the help of the adapter is easy: in the connectors located on different sides of the “box”, you need to insert the patch cord connectors.
In addition to special devices for extending the Internet cable, sometimes they use equipment that has a completely different purpose - for example, external power sockets or internal working parts of built-in sockets.
Some craftsmen manage to connect hubs. There is no need to do this, since there are simpler and easier ways described above.
How to crimp a cable to make a connector switch:
Video instruction on twisting:
The recommendation how to quickly build up a twisted pair - patchcord:
The easiest way that does not require a special tool and skills is twisting. However, according to experts, it is absolutely not suitable for high-speed data transfer.
If you want to get a really high-quality connection, we recommend that you purchase a factory-made wire and connect it to the devices in accordance with the instructions and safety standards.
Is there anything to supplement, or have questions about connecting a twisted pair cable to each other? You can leave comments on the publication, participate in discussions and share your own experience in building a network cable. The contact form is located in the lower block.