A modern module for comfortable reception of water procedures at home is often called a hydromassage box. A simplified popular name is a shower cabin.
The interest to install and assemble a shower tray alone is haunting many potential buyers. We will try to figure out how to properly assemble and install, avoiding common mistakes.
A variety of modern models of showers
People are interested in both inexpensive practical cabins, and advanced models, supplemented with special devices:
- cascading shower
- hydromassage module
- steam bath.
Obviously, domestic showers quickly gained popularity in society. In the wake of increased demand, the production of such modules has become profitable for manufacturers.
As a result, the production of products of various configurations intended for installation as part of a wide variety of bathroom projects was established.

Original design shower cubicle with rectangular steel water collector. The design uses a shallow collector with a width of more than 110 mm
It is clear that the possibility of installing a cabin in one place or another is directly related to the size and shape of the shower tray - one of the main elements of the whole structure.
Sizes and shapes of water collectors
The overall dimensions of the water collectors and their subsequent discharge to the sewer, as a rule, are the basic parameters that determine the total usable area of a fully assembled shower cabin. Designs for collecting and discharging water can be divided into small, medium, large - depending on their overall dimensions.
Compact products are limited to a size of 700 x 700 mm, the dimensions of medium-sized modules are in the range of 800 x 800 mm, large collectors have a width of at least 1100 mm.
Also significant is the size that determines the depth of the shower tray. An insufficient or excessive parameter of the pallet in depth may complicate the assembly of the structure in some cases or, conversely, facilitate the work of the installer.
Image Gallery
Photo from
Small shower tray
Medium depth plumbing fixture
High design with mini bath function
Pallet with extra space
The functionality of the hydromassage box and the degree of convenience for the user to some extent depend on the parameter of the depth of the tank.
In relation to this parameter, there is also a certain division according to the design of shower trays:
- small (up to 40 mm),
- medium (up to 100 mm),
- deep (from 180 mm).
The configuration of products by their shape also provides the user with a wide selection. The most common are shower trays that have a rectangular, square, angular shape.

Corner hydromassage boxing is a system of full-fledged reception of water procedures with body massage functions. Design for voluminous bathrooms, but there are also smaller versions
Simple configurations of forms are usually preferred when it becomes necessary to assemble the structure in the conditions of standard bathroom facilities (city apartments, small cottages, condominiums).
In addition to the traditional options for the forms of shower trays, there are also others:
- oval;
- round;
- cocked hat;
- pentagonal;
- exclusive.
If you choose by price, products of a square, rectangular, angular shape are relatively inexpensive.
The assembly of a cabin with a shower unit is not affected in any way by the surface configuration of the bottom of the pallet. But this point is fundamental in terms of safety when using a shower.
Hot tub pallets with a corrugated bottom surface reduce the sliding effect to a large extent. This provides a higher level of security for the user.
Materials for pallets for domestic cabins
Shower trays are manufactured taking into account the possibilities for different installation. This approach pleases the consumer, but at the same time makes you think about assembling a pallet for a particular shower.
However, thoughtfulness quickly goes away if the successful owner of the device is ready to carefully read the installation instructions, including the assembly of such an element as a shower tray.

The internal structure of the acrylic water collector is built on the basis of several layers. Reinforcement of the structure provides a stainless steel frame
Manufacturers of hydromassage boxes make pallets for collecting and draining water from various materials. Most often there are products made on the basis of plastic or acrylic. For buyers, this is an inexpensive option of all available, but not the most optimal in terms of performance.
Also for the production of shower trays use materials:
- enameled steel;
- machined cast iron;
- faience (ceramics);
- marble (artificial stone);
- kvaril (a combination of quartz with acrylic);
- glass;
- and even a tree.
Faience and marble pallets are best suited for showers, but assembling devices with such pallets requires a lot of money. The high cost here is due to the technology for the production of faience (marble) products.
These materials look beautiful, can quickly heat up and retain heat for a long time. In addition, faience and marble have increased wear resistance.
The disadvantage of faience and marble products is the fragility properties of these materials. Under shock loads, such structures are capable of collapsing.
Quartz pallets are on the list of expensive products after marble and earthenware. Quaril - a modern material, consists of a mixture of acrylic and quartz. In terms of performance, quartz pallets are only slightly inferior to ceramic ones.

The metal frame of the shower water tank, due to which the degree of strength of the product significantly increases. The frame frame is also used as a global structural support.
When the buyer becomes interested in shower enclosures with a reinforced tray, the first option is usually considered primarily the quartz version. The properties of durability and good thermal insulation were obtained by the inclusion of quartz in the structure of the material.
Cast iron pallets have a low coefficient of thermal conductivity, which means effective heat conservation. However, it takes some time to warm up the cast iron.
Image Gallery
Photo from
Cast iron tray in a classic style
Sustainable cast iron construction
Installing a cast iron tray without a screen
Care for cast-iron shower fixtures
Structurally, cast iron trays are a reinforced version of the base of shower cabins. They are strong and reliable, but without adequate protection from the influence of the external environment there is a risk of corrosion.
Therefore, modern designs of cast-iron trays intended for assembling a shower cabin are usually coated with protective enamel. A pronounced drawback of such products is their significant weight, which affects the assembly process.
Steel pallet models are also relatively sturdy. But steel pallets do not have pronounced heat storage properties. With the work of such structures under increased load, too, everything is not unique.
There are examples of the operation of showers when reinforced steel trays are deformed from overload. This type of product, like cast-iron pallets, is treated with enamel, and deformation leads to damage to the enamel coating. The degree of reinforcement of the steel structure indicates the thickness of the material — the metal sheet.

Steel enameled water collector as part of one of the modern modules for receiving water procedures. An interesting design solution along with an optimal technical approach
Acrylic containers for collecting and draining water - this is the most popular option used in the assembly of shower cabins. Lightness, strength, good heat storage properties, low cost have made acrylic projects the image of popular products.
For acrylic constructions, there are no restrictions on the shapes and colors. They are easier to assemble than shower trays made of other materials. They are also easily and simply repaired if necessary. To strengthen the acrylic shower trays, an additional metal frame is often mounted.
The construction of the steel frame is performed in order to smooth the load in the central region of the bottom. It is in this area that cracks or kinks usually form.

To strengthen the bottom of the shower cabin, support steel brackets are mounted at several points, fixed perpendicular to the horizontal channels of the frame
Also, supports can be made of other materials: textolite, plastic, wood, etc. Some strict schemes for manufacturing the reinforcement cage are not provided, although part of the shower cabins is equipped with ready-made solutions. You can apply any scheme. The main thing is to correctly determine the load zones and successfully select the fulcrum.
Brief photo instruction
So that you can visualize the volume and sequence of work on installing and connecting the shower tray, we suggest that you familiarize yourself with the photo selection. She demonstrates the main steps of the process:
Image Gallery
Photo from
Step 1: Preparing the walls of the bathroom for the installation of a shower
Step 2: Cleaning and repairing the concrete base
Step 3: Marking out the foot tray
Step 4: Fastening the support structure with self-tapping screws
Step 5: Adjusting the Feet to the Position of the Pallet
Step 6: Ensuring horizontal plumbing
Step 7: Marking the height of the pallet on the wall in fact
Step 8: Marking the location of the shower siphon
The above steps are essentially preparation for installation and connection of a shower tray. Upon completion, proceed to the direct installation:
Image Gallery
Photo from
Having applied the building level to the wall in order to use it as a ruler, we mark the line of the side of the pallet. Do not forget to check the bubble of the device, which should be exactly in the middle of the bulb during drawing
By marking, we drill holes into which we will hammer the dowels. The depth of the holes is better to make 1 cm more than the length of the dowel, so that the dust remaining in the wall does not interfere with it being completely immersed there
We put dowels into the drilled holes, hammer them with a hammer until the fixture is completely immersed in the wall
Having attached the shower tray mount to the wall, we twist the screw through its hole into the dowel designed for it. We also fix the rest of the mounts
On both sides of the pallet, which will be adjacent to the walls, glue the waterproofing strip
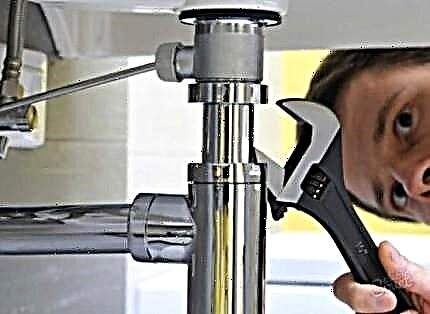
We collect a siphon for a shower tray, attach it to the installation site, in fact mark the required length of the sewer pipe. We connect a pipe segment to a siphon, and together with them to the sewer outlet
We install the pallet in the place prepared for it, snap its side with the terminals that we fixed earlier and once again check the horizontalness of the sides
After checking the horizontalness of the sides we put in place the external parts of the shower siphon
Step 9: Marking the line of the rim of the shower tray
Step 10: Drilling holes for mounting fixtures
Step 11: driving the dowel into the drilled hole
Step 12: Locking the Shower Tray Mounts
Step 13: Adhesive Waterproofing Strip
Step 14: Assembling and connecting the shower trap
Step 7: Fixing the shower tray with terminals
Step 16: Installing External Siphon Parts
Installation of reinforced water collectors
Regardless of the configuration of the tank for collecting and discharging water, which is included in the package of the hydromassage box, the assembly of this design provides for the preparation of the base for installation.
Preparation includes work aimed at leveling the surface of the floor and walls in the installation area. In addition, all the necessary steps are taken to create an effective waterproofing. The sewer line for water drainage is marked and displayed. We also recommend reading about how to properly connect a shower to communications.

Preparation of the place where installation of the collector and drainage of the hydromassage box is supposed. In this case, the option with a foundation made independently
The drain line is connected to a point previously prepared and displayed at the installation site, or to an existing bathroom drain system through a corrugated extension cord and tee.
In the latter case, it is necessary to observe the difference in the differences of the lines by levels, so that the water can be drained unhindered. The desired differential value is achieved when assembling the shower tray by setting it to the required height.
For the construction of a drain into the sewer, the following tools and materials will be required:
- corrugated pipe (d = 40 -50 mm);
- plumbing siphon;
- fluoroplastic sealing tape (FUM);
- building level;
- a set of locksmith tools.
The plumbing siphon and part of the corrugated pipe are mounted on the pallet body even before it is installed in the prepared place. The siphon installation accuracy must be observed in full accordance with the attached instructions.
The position of the gaskets, the tightening of the fixing rings should ensure reliable tightness. It is recommended to check the insulation of the joints, close the outgoing end of the corrugation and fill the shower trap with a small amount of water. If a leak is not detected, you can safely assemble the system.
Pallet assembly instructions
Consider several popular options for installing a shower tray or showers. Each of them has its own characteristics, although the procedure for performing actions is usually the same.
Option # 1 - Acrylic reinforced construction
A reinforced version of the shower tray involves the use of a frame of strength. The frame frame is usually fixed at the bottom of the pallet due to special metal studs. Such studs are screwed at one end into holes located at the edges of the pallet, and support “legs” are screwed onto the other end of the studs.
Just above the support legs, frame metal elements are placed under the bottom of the pallet. Their vertical and horizontal positions can be adjusted with nuts and fixed with locknuts.

The angled water collector assembled on the frame and supporting legs. It is easy to adjust the position of the pallet vertically and horizontally with the help of nuts wound on studs
Equipped with reinforcing elements and support legs, the shower tray is placed at the place of deployment. By rotating the support legs in one direction or another, the pallet is aligned horizontally. Horizon accuracy is controlled by the construction level.
It is also necessary to maintain the specified size of the installation height of the pallet in order to ensure the conditions of the difference in the level of discharge. According to the requirements, this difference should be at least 20 mm per 1 meter of sewer line length. All that remains is to hang decorative panels.
Such assembly technology traditionally applies to showers where an acrylic water collector is used in the kit. Some designs of steel pallets may also provide for similar installation, but not always.
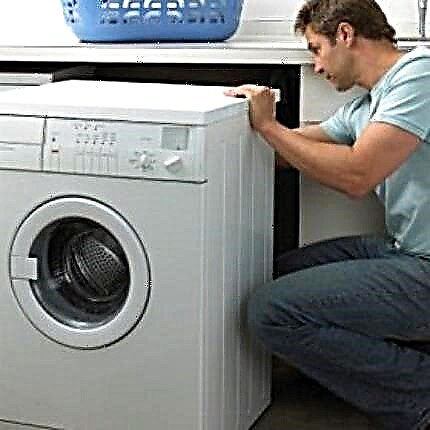
Option # 2 - mounting a steel pallet
Household models of shower cabins with a steel tray, as a rule, are available in two types: shallow in depth (less than 300 mm) with overall dimensions 800 x 800 mm or 900 x 900 mm and deep (over 440 mm) with dimensions only 800 x 800 mm.
But the requirements for joining the sewer network are the same. Thus, from the point of view of the sewerage connection, there is no global difference in the installation of steel pallets.
Image Gallery
Photo from
Low steel shower tray
Lightweight design with anti-slip surface
Enamel instability
Pallet support structure
Another thing is the assembly of a shallow and deep steel pallet, with an eye on the supporting component. Deep structures with a high side are usually endowed with supporting parts - legs (included in the delivery).
Option # 3 - assembly on a makeshift foundation
But the assembly of shallow shower trays is usually carried out on the foundation or on self-made supports, as the equipment is not provided in this case with supports.
The foundation for the steel shower tray is brick, stone, block, etc. In the case of supports, you can apply metal parts (channels, pipes, angles).

One of the possible options for supplying a drain line to connect to it a shower tray. In practice, other options and schemes may also be applied.
Masonry assembly provides an accurate definition of the boundaries of the contour of a steel pallet. On this contour, with a slight indentation inward (by 5-10 mm), lay out the foundation.
As masonry is completed, consideration should be given to creating a slight slope towards the sewer inlet. Thin-walled steel collectors are not particularly durable.
Therefore, in this version of the assembly, the structure should be strengthened with an additional frame or lay supporting columns of brick directly under the points with maximum load. This approach will protect the steel pallet from its deformation.

Brick foundation for steel, cast-iron and any other shower enclosure. The simplest masonry technology that every homeowner can handle
On the surface of the brick foundation, lay a high-quality damping material, for example, a tape made of hard technical rubber half a brick wide. All additional supporting elements of the foundation are equipped with the same dampers.
Next, a steel water collector is placed on the foundation, the siphon is assembled with a drain line, after which the entire structure is finally fixed. Typically, fixing the steel water tank to the foundation is done with cement mortar. If you are interested in a homemade tile tray, we recommend that you read the detailed instructions for its construction, which is on our website.
Useful information from the video will help you install plumbing equipment yourself.
Acrylic Pallet Assembly:
Intentions to change the bathroom environment in an apartment of a municipal residential building are not the exclusive prerogative of the owner of the apartment. Owners of municipal housing should be aware of the existing rules related to the reconstruction of premises and communications. Only upon receipt of the appropriate permission from the authorities, it is possible to begin construction or installation work.
Have questions, notice inaccuracies or want to supplement this material with valuable information? Leave your comments in the box below. Or maybe you had to independently assemble a shower tray - share your experience with our readers.