One of the cheapest types of fuel used for heating boilers is waste oil. It can be any: synthetic or natural. Suitable oil drained from cooking units, cars or diesel locomotives.
In any case, during combustion, it will give a large amount of heat. Therefore, to assemble a boiler with waste oil with your own hands is very profitable. Especially if you need to heat the utility room or garage.
We will tell you how the heater is arranged and works, what are the structural nuances of a home-made unit, and also describe the step-by-step process of assembling the boiler and the features of its operation.
Workout heating: profitable or not?
The waste oil heating system is in high demand. And this is no coincidence, because it has many advantages. First of all, this is the affordable cost of devices and operation.
Given that the price of fuel for such a boiler is very low, it will pay for itself in the first heating season. In addition, if you do not buy equipment, but assemble it yourself, it will cost even less.
Image Gallery
Photo from
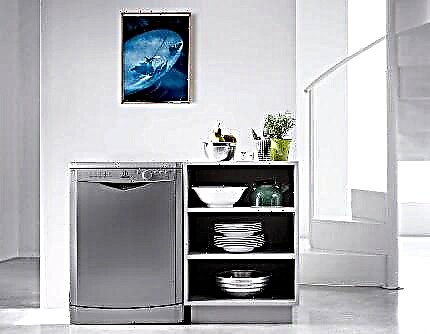
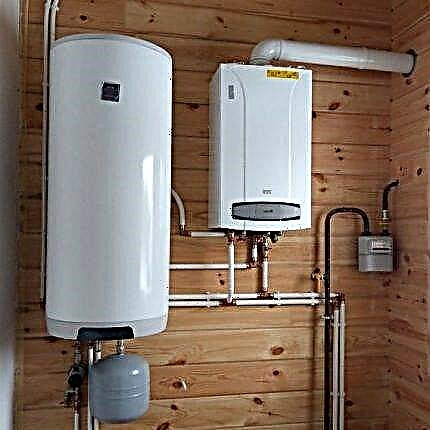
The main purpose of the waste oil boiler is to prepare hot water for supply to heating or sanitary water circuits
The boiler equipped with automation does not require the participation of the owners in starting and stopping heating. The equipment activates and stops all processes
Transmission, hydraulic, engine oils are allowed to be used as fuel. It is not recommended to put in the unit tank the oils used as coolants
Development boilers are an excellent alternative for solid fuel models. They are more economical, they are more readily installed in non-gasified regions
The simplest version of the developmental boiler is a stove with a water circuit arranged around the upper chamber. In it, the coolant is heated before being fed to the heating devices
Since the volume of coolant heated in the boiler’s water jacket at the end of the run is insignificant, a circulation pump is most often included in the system. It will ensure stable water movement and regular heating of the return.
For closed heating systems, in addition to the circulation pump, an expansion tank and a safety group, in which there is a safety valve and an air vent, will be required
Instead of a water jacket located around the upper chamber of the stove, you can use a conventional tank to which a heating circuit is connected
Typical waste oil boiler
Automation for the organization of the boiler
Types of oil for processing in the boiler
Equipment for non-gasified regions
Workout stove with a water jacket
Circulation pump in the heating circuit for testing
Expansion tank in the heating circuit
Water tank as a heat exchanger
A properly configured boiler completely burns the used oil. Toxic combustion products do not form, therefore such a device is safe for the environment. The design of the device is very simple, it uses a minimum of parts. Thus, the risk of device failure decreases and its reliability increases.
The boiler quickly heats up and raises the temperature in the room, which is facilitated by forced convection.
The device also has disadvantages:
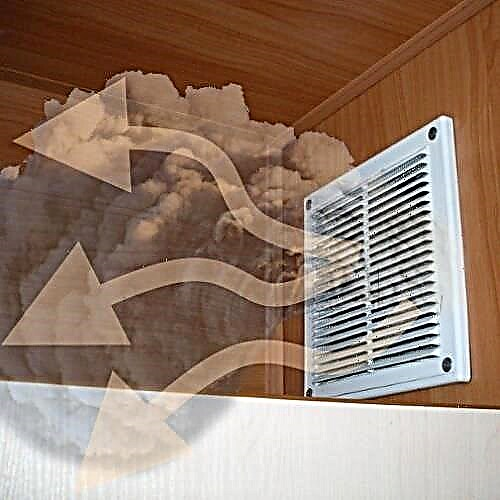
- Fast burnout of oxygen in the room where the device is mounted, a hundred requires the arrangement of an effective ventilation system.
- The need for regular cleaning. Development boilers are quickly polluted, and therefore their maintenance is required more often.
For the operation of the equipment, any used oil or a mixture of several oils can be used.

Natural and synthetic oils, as well as mixtures in any proportions, can be used as fuel for a development boiler
The heterogeneity of the raw materials used and the high probability of the presence of a wide variety of impurities in it require a special filter. It is placed on the oil supply to the boiler. In the process, the filter gets dirty quite quickly, so you will have to change it often.
The boiler is working out: what are they
Manufacturers produce three types of liquid fuel boilers. Air heaters increase the temperature in the room by directly heating the air. Such devices are characterized by high performance and are able to maintain temperature for a long time even in large areas.
The fuel tank for such devices is usually located on the floor, and the air heater itself can be mounted on the ceiling or on the wall.

The exhaust heater can warm the air in the room or heat the water circuit, and sometimes two at once
Boilers are designed to heat the coolant, usually water.
There are two types of equipment:
- bypass - able to heat water for domestic use and heat the coolant;
- single-circuit - “responsible” only for heating.
Automatic heat generators belong to boilers. They are equipped with an automation system that controls the operation of the device.
Automation for spent boilers can perform different functions. This can be control over the temperature of the air in a heated room, control of heating the coolant, etc.
Development boilers with or without automation are performed exclusively in the floor version. Their cost differs significantly depending on the functionality. However, in any case, it is quite large, so home craftsmen assemble such devices with their own hands.
How does the heater work
The design of the boiler is extremely simple. It includes two chamber compartments: evaporative and combustion. In the first, the process of preparing the oil for combustion takes place; in the second, it burns out.
Everything happens as follows. From the waste tank, the pump supplies the used oil to the evaporation chamber, which is located at the bottom of the device. Here, a temperature is maintained sufficient to allow the mining to heat up and begin to evaporate.

This is how a boiler works with oil evaporation and forced air supply (+)
Oil vapor rises to the top of the housing where the combustion chamber is located. It is equipped with an air duct, which is a pipe with holes. By means of a fan, air is supplied through the duct and mixed with oil vapor.
The oil-air mixture burns out almost without a trace - the received heat heats the heat exchanger, the combustion products are sent to the chimney.
Preheating the oil is an essential part of the process. You must understand that mining contains a large number of impurities and toxic substances. All this is decomposed into simple carbohydrates, which are subsequently burned.
After which water vapor, carbon dioxide and nitrogen are formed, completely harmless elements. However, such a result is possible only subject to certain temperature conditions.
Complete oxidation or combustion of hydrocarbons occurs only at a temperature of + 600 ° C. If it is lower or higher by 150-200 ° C, then in the combustion process a large amount of a variety of toxic substances is formed. They are unsafe for humans, so the combustion temperature must be precisely observed.
Design subtleties of homemade equipment
The most important component of the combustion technology is considered to be the preliminary heating of the oil. This makes it possible to decompose the "heavy" fuel into lighter components. Well-chosen parameters make it possible to obtain almost smokeless and complete combustion of used oil.
Home craftsmen believe that the easiest way to achieve such a result is if you use a thick-walled red-hot metal bowl, into which mining is fed with drops.

One of the possible schemes of operation of heating equipment with oil evaporation (+)
When the oil touches the hot metal, it immediately turns into fumes, which are sent to the combustion chamber. For better combustion, they need to be mixed with air. For this purpose, use the duct.
An impeller is installed in its mouth to create a flow swirl necessary for a sufficiently long stay of the oil-air mixture in the combustion chamber. Only in this case the fuel supplied to the bowl will burn out completely.
A certain difficulty in the process of activating the operation of the heater is the heating of the evaporation bowl.
The easiest way to implement it is to put a wick soaked in any combustible composition inside the tank. Then pour a little gasoline or diesel fuel on the bottom of the bowl and set fire to it. After the metal has heated to the desired temperature, an oil supply is started. This is the simplest, but rather dangerous way.
Another difficult moment to implement is the oil supply. On the Internet and other open sources, you can find many examples of boilers operating on waste oil, where the supply of waste is carried out in a jet.
Yes, such a system is operational, but it is extremely dangerous for the user. The flowing oil does not have time to burn. A large number of toxic substances are formed that can enter the room. And this is very dangerous.

So you can organize the drip feed of used oil into the evaporation bowl. The nipple, tees and a fragment of a medical dropper are used
For effective smokeless combustion mining requires the organization of a drip oil supply. It is quite complicated, but quite solvable. The optimal, according to home masters, method of drip feed is as follows.
You need to take a hose that will work as an oil pipe. At one end, a filter is necessarily fixed on it to clean the feedstock from impurities and contaminants.
This should be a complete automotive oil filter. The latter is very important. Not partial, but complete. You need to be prepared for the fact that you will have to change it often. On average once every 30 days, or even more often. Everything will depend on the quality of the fuel used.
Some difficulty may arise in the process of attaching the unit. It is equipped with a thread with which it is fixed in the car.
You can do the following. You should find a small piece of oil-resistant hose, the diameter of which will coincide with the cross-section of the thread, and put it on the filter. The resulting assembly is connected to the oil pipe by means of a fitting.
It is very important that excess oil does not accumulate in the oil supply hose, otherwise drip feed will not be possible.

Pyrolysis type boiler. Due to the presence of the afterburner, the burning time of one portion of fuel is significantly increased
Alternatively, you can choose a pump of such power that it gives out only the required amount of working out. But it is very difficult. A simpler option is used in boilers for industrial assembly. It is a simple construction of tees, fitting and nipple.
With it, you can easily adjust the flow of the right amount of oil. Excess will be returned to the fuel tank.
The last element of the drip feed system is a fragment of a medical dropper. It is necessary to take a site with a regulator wheel. The element will allow you to control the speed and frequency of fuel supply to the bowl. A fragment of a dropper is securely fixed on the fitting.
It is optimal so that mining does not fade and burn steadily. This is only possible if the oil has normal fluidity. To do this, its temperature should be in the range of 10-20 ° C.
You need to know that with every change in the composition of the mining or its temperature, you will have to re-select the frequency and speed of the drip oil supply. It will not work to supply fuel directly from the dropper to the combustion chamber. It is sent to a funnel connected to a pipe supplying fuel to the bowl.

In such a simple way, it is possible to organize a uniform supply of oil into the chamber and thereby extend the burning time of one stored portion of the fuel (+)
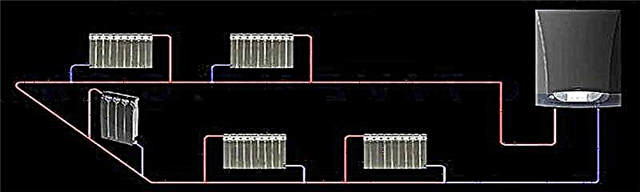
The design of the boiler may be different. It can be connected to the pipes of the heating system. A prerequisite in this case is the installation of a pump to ensure efficient circulation of the coolant.
If a so-called water jacket is arranged around the device, it will heat the water. If there is only one water circuit, the boiler will only serve heating. If there are two circuits, the supply of hot water will also be provided.
Image Gallery
Photo from
Development furnace with a water circuit
Tank for periodic refueling
Oiler welded into the lower chamber
Bottom chamber drawer
Another option is a built-in heat exchanger in the form of the letter U. It is placed in the upper part of the furnace part and connected to a remote tank in which there will be hot water. An alternative is to place the heat exchanger on the chimney.
The development boiler may be pyrolysis. Its main feature is the possibility of continuous operation on a single fuel tab. Structurally, such a model will be distinguished by the presence of a afterburner.
Here, the final combustion of all chemical elements that make up the waste oil takes place. Due to the presence of the afterburner, the operating time of the pyrolysis boiler per serving of oil is significantly increased.
How to make a boiler yourself
For the manufacture of a heating device, we need the following materials and tools. We prepare sheet steel with a minimum thickness of 4 mm, fittings with a cross section of 10 or 8 mm, a pipe for the duct, tees, elbows and half-inch angles for the burner, steel adapters, a compressor, an expansion tank and a pump.
In addition, you will need welding equipment, heat-resistant sealant, asbestos cloth and grinder.

One of the simplest designs of a developmental boiler. Such a device is very simple to manufacture independently, while it will work efficiently
Consider the manufacturing process of the simplest home-made boiler for testing. The device itself can take many forms. In this regard, to facilitate the work, it is possible to take not sheet steel, but a section of a large section pipe with thick walls.
For example, a workable appliance that easily heats a standard-sized garage is obtained from two pipe fragments. One section is 0.5 m, the second - 0.2 m.
In addition to them, you will need two more metal plates with a minimum thickness of 3 mm, cut in the shape of a circle. If you need a more powerful heating device, then parts of the right sizes are selected or made of sheet steel.
Now you can proceed to the assembly. We start with the preparation of the corps. It will be made of a larger section pipe. We cut it with a grinder so that a fragment of a height of the order of a meter is obtained.
A pipe of a smaller cross section is also cut. So that we get a fragment with a height of 20 cm. Now we are preparing plates that will function as the bottom and cover of the case.
In one of them we make a hole corresponding to the size of the chimney. This will be the housing cover. In another, we cut a hole for connecting to a fragment of a small pipe. This will be the bottom of the structure.

A detailed scheme for the manufacture of a boiler at workout indicating all the necessary sizes (+)
We weld to it a cylinder cut from a pipe of a smaller diameter. We close its bottom with another round plate.We assemble the case, covering it with plates on both sides. We connect the parts, scald them in a circle.
To the bottom of the case we attach legs made of reinforcing bars. We drill ventilation holes in the pipe. We got a cylindrical boiler, in the lower part of the body of which there is a small tank.
Now you need to equip the door. Cut it at the bottom of the cylinder with a grinder. We put and fix the chimney on the upper part of the body. The simplest version of the boiler is ready.
To ignite it, you will need to pour a little working out into the lower container and set fire to it with a wick of burning paper. This is the easiest of all known options. You can assemble a more complex, and therefore more efficient design.
The actual schematic diagram of any fuel device at the end of the run is two boxes of durable metal, interconnected by an air duct in the form of a perforated pipe.
The bottom box is equipped with a hole through which oil is poured into the evaporation chamber, a shutter is usually located opposite it. The upper duct is equipped with an opening into which a chimney is inserted.
It is very simple to supplement such a scheme with a wide variety of components: an oil feed pump, a drip feed of an exhaust, an air compressor, or a fuel supply tank connected to the boiler.
You can also connect a water circuit. But in this case, it will be necessary to equip an efficient burner that can realize the most uniform heating of the coolant.

A burner option for a developmental boiler that runs on a glow plug from a diesel engine. Such a burner can be used for appliances that heat the water circuit.
Consider the manufacturing process of such a burner. Actually, its shape can be arbitrary, but it must be remembered that the mixing zone should always be only above the combustion zone.
Only in this case, unused mining will be able to return to the tank. To make the burner body, we take half-inch corners and connect them using tees and bends.
For the oil pipe supplying the working out, in addition, adapters for the fitting are needed. Before screwing in, tighten all screwed connections with heat-resistant sealant. We use sheet steel to cover the burner. Sheet thickness at least 3 mm.
We cut out a part corresponding to the size of the socket on the boiler. After we assembled the burner, it remains to install it correctly. To do this, prepare two steel plates, one should be slightly smaller than the other, nuts, bolts and asbestos cloth. Half-inch tubes and the inside of the adapter must be covered with asbestos. The canvas must be fixed.
Glue it with silicate sealant in two layers, fix the asbestos on the tubes with steel wire. Now we take the burner and insert it into the housing, if necessary, we adjust it to the installation at the socket.
After the burner "fell" into place, install a smaller plate in the socket and cover it with several layers of asbestos cloth. Optimally, if there are four or five.
We use a large plate as a fixing pad. We drill several holes in it for fasteners, after which we lay on top of asbestos and twist both plates with bolts.
It must be understood that the resulting connection should be as dense as possible, if this is not so, the elements of the burner may budge during operation. To ignite such a burner, a standard glow plug is used, which is used in diesel engines.
In a simplified version, the developmental boiler is a stove to which a heat exchanger or tank is connected to heat the coolant. The following selection of photos will introduce the process of making a homemade stove:
Image Gallery
Photo from
Step 1: Preparing Parts for Assembly
Step 2: Fitting the Lower Tank Components
Step 3: Assembling the Top Cover of the Lower Tank
Step 4: Fixing the bottom of the bottom tank
Step 5: Connect the lower tank cap
Step 6: Weld Cover Parts
Step 7: Installing the Internal Fender
Step 8: Welding the chimney
The top of our homemade stove is ready. Now you need to assemble the lower part and connect the components:
Image Gallery
Photo from
We install an injection pipe in which 56 holes are pre-drilled. Plant it in the lower part of the upper tank. Mark its location, weld
We assemble the upper tank from two parts, the chimney pipe is welded to the upper one, and the injection pipe to the lower one
We weld the upper part of the lower tank to the injection pipe. We carry out all work on connecting the tanks to the pipes, controlling the assembly at the building level
We adjust the shell of the tanks so as to achieve the most tight fit, practically without gaps
Weld fit to each other parts of the lower tank. First we cook with dots, then with a continuous seam
In order not to add oil constantly processed in the oven, we build an additional tank. It will be attached to the lower tank of the stove
We put an overflow pipe at the bottom of the stove, which will provide a metered supply of oil to the lower tank. In order to provide the tube with space, and the stability of the stove with the bottom, we weld two pieces of corner
We weld the legs to the assembled structure. For stability, it is better to make three. If some roll is observed, then it will be necessary to adjust the bottom of the support with a file
Step 9: Installing the Injection Pipe
Step 10: Assembling the Top Tank with Welded Pipes
Step 11: Installing the Lower Tank
Step 12: fitting parts of the lower tank
Step 13: Welding two parts of the lower tank
Step 14: Installing the Oil Fill Tank
Step 15: Installing the Overflow Tube
Step 16: Welding the legs to the finished structure
Since the homemade stove we built did not initially have a heat exchanger, we weld it separately and attach it to the upper chamber of the device:
Image Gallery
Photo from
Step 1: Open the bottom and lids for the water tank
Step 2: Fitting the side wall to fit the tank
Step 3: Attaching the Second Crescent to the Shell
Step 4: Fixing the inner wall of the tank
Step 5: Installing two coolant fittings
Step 6: Trying the water tank to the stove
Step 7: Attaching the water tank to the stove
Step 8: checking the stove
This is just one example of the manufacture of a tank for heating a coolant with a working furnace. In fact, there are a lot of build options. The main thing is to choose a design suitable for implementation and calculate the required coolant volume.
Interesting manufacturing options for improvised home appliances that are used in mining are described in these articles:
- Oven working out of the pipe: how to make an effective furnace on waste oil from improvised materials
- How to make a potbelly stove on waste oil with your own hands: options and examples of making a stove
- DIY heat gun for used oil: step-by-step manufacturing instructions
A bit about safe operation
Heating appliances operating at the working out are quite dangerous in operation. This must always be remembered.
In order not to cause trouble, you should strictly follow a few simple rules:
- The room where the heater is installed must be equipped with effective ventilation.
- The boiler must be equipped with a correctly designed and executed chimney that removes combustion products without residue. It must have a shutter.
- The section of the passage of the chimney through the roof is carried out by installing a special casing.
- The boiler must be installed in accordance with fire safety requirements.
- Storage of combustible and flammable materials in the vicinity of the heater is strictly prohibited.
The boiler at work-out, like any other heating device, must be treated with attention. Carry out all the necessary preventive work in time, then there will be no problems with the operation and its safety.
How to assemble the boiler yourself at workout:
Development boiler with connected water circuit:
Another constructive version of such a boiler:
Workout heating equipment is a practical solution for organizing heating of utility or garage premises. More complex models, equipped with automation that monitors the combustion process and safety, can also be installed as a heating device for the home.
The main advantage of such devices is the use of cheap, sometimes free fuel, which makes their use as beneficial as possible for the owner.
If you have experience manufacturing a waste oil boiler, please share this information with our readers. Leave comments on the article and add photos of your homemade products in the form below.