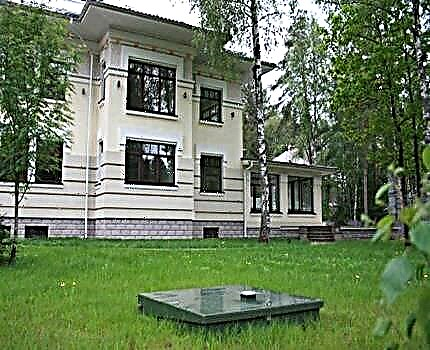
Wooden houses are no longer a rarity in suburban construction. Due to the unique structure and environmental safety of natural wood, they have much more advantages than analogues of brick or concrete. In such houses it is easy to breathe, in them it is warm and comfortable even in the most severe frosts.
Despite the positive qualities, some relate to buildings made of wood with caution. The main fears are caused by the bathroom in a wooden house and the process of its arrangement. The excitement is quite justified, because the organic building material intensely absorbs moisture, and this is fraught with decay.
The right approach to planning and finishing the bathroom will help to avoid these problems. We will tell you how to better lay communications and place plumbing in a hygienic room. We will reveal all the subtleties of a waterproofing device and finishing.
Where and how best to position the bathroom?
First of all, at the design stage, you need to choose the optimal place for the arrangement of the bathroom. It is advisable to place it on the ground floor next to the bedroom, dressing room or between two rooms.
If the living space is large, then for convenience in the house there may be several bathrooms on different floors. In this case, the premises are equipped one above the other. Moreover, preliminary calculations of the load on the floors in wooden houses are of great importance.
Given that the average weight of a standard bath is about 100 kg. Filled with water, it weighs twice as much. Plus the body weight of the person taking the bath. Because of this, the design load is increased to not less than 460 kg / m2.
Image Gallery
Photo from
Installation of a bathroom in a wooden house
Building a separate foundation for the bath
Hygienic room on a slab foundation
Porcelain stoneware
Jacuzzi in the bathroom of a wooden house
Ceramic floor tiles in the bathroom
Acrylic bathtub in the attic space
Wooden floor in the bathroom
In order to obtain the required design load parameters, the following measures are taken:
- reduction in the step of laying beams;
- the use of ceilings with a large cross section;
- an increase in beam thickness of 25 percent.
The floor in the bathroom is more appropriate to do slightly lower than in other rooms. The reserve in height will protect the house from flooding in case of unforeseen circumstances occurring due to pipe breaks or equipment breakdowns.

An increased load will be imposed on the floor floors in the bathroom. They should be much thicker and stronger than standard designs.
During planning, you need to draw a layout of the plumbing equipment, risers, fixtures, valves.
Features of arranging a communication system
When a suitable place is chosen, it is time to think through all the nuances that accompany the connection of communications to the room. It is advisable to draw up a detailed plan, where to indicate the location of each individual element.
Subtleties of the organization of water supply
Condensate is an avid enemy of all wooden structures, often formed in large numbers on pipes with cold water. You can protect wood in the bathroom from it by choosing plastic pipes instead of metal products.
Plastic is characterized by lower thermal conductivity, which means that the amount of condensate on it will decrease and will tend to a minimum.
Image Gallery
Photo from
Foam partition for water supply
Providing movement to structures
Fittings for the assembly of polypropylene water pipes
Pipe laying in ceilings
Useful installation recommendations will help to nullify the risk of rotting of wooden structures, namely:
- exception of contact of pipes with walls;
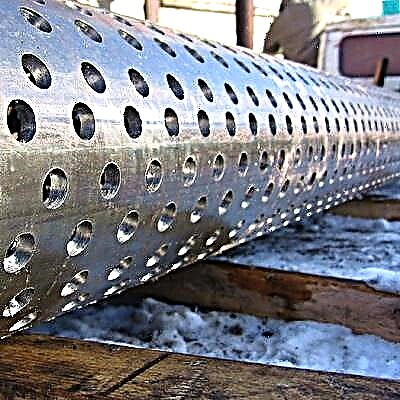
- thermal insulation of structures using special tubes made of foamed polyurethane;
- fixing the pipeline with clamps equipped with rubber gaskets;
- arrangement of a drain valve that will discharge the accumulated water on the floor.
Compliance with these simple rules when installing a plumbing in the bathroom will prevent early destruction of the supporting structures of a wooden house.

To equip the water supply of the bathroom in a wooden house, it is advisable to buy plastic pipes. They are resistant to deformation, and this is important, because a house made of timber or logs gives noticeable shrinkage over time
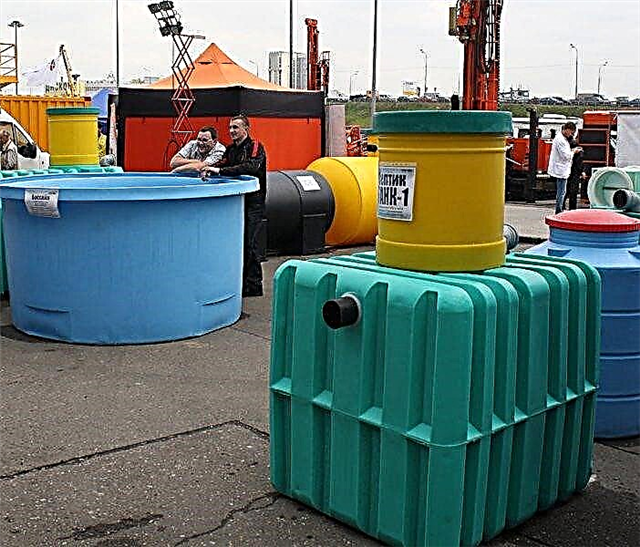
Basic sewage requirements
To sewage systems in wooden houses put forward special requirements. Any leaks are dangerous for wood, so it is imperative to carefully check the tightness of all joints.
Also, freezing of pipes must not be allowed. Due to illiterate arrangements for natural ventilation in winter, his risk is quite high. An effective option for the prevention of this phenomenon is to bury sewer pipes in the ground.
The process of organizing a sewer pipeline in a log house will be demonstrated by the following photo selection. The construction was carried out on a concrete slab poured over the ground. The work included not only laying the drainage system, but also preparing the floor for further decoration:
Image Gallery
Photo from
After assembling the water supply and sanitation lines located in the ceiling, we heat the floor with extruded polystyrene foam in three layers. We install thermal insulation with a run of seams
In order for the components of the structure under construction not to move during further work, we fix all the components with tape. We glue all the joints between the plates of insulation
On top of the insulation we lay a reinforcing mesh, the mesh size of which is at least 10 × 10 cm
We have a reinforcing mesh with an overlap of at least one cell. We connect the “cloths” of the net with a knitting wire. It is advisable to additionally fix the grid with brackets on the insulation
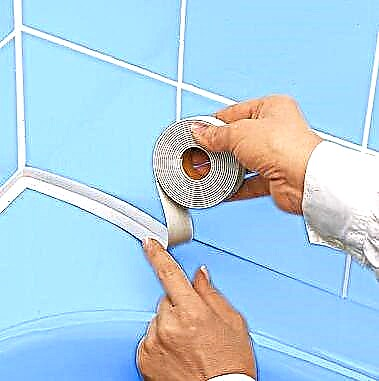
Before pouring around the perimeter, we lay a foam polyethylene tape so that there is a gap between the screed and the walls. In order for the grid to be in the thickness of the screed, in places we place pieces of insulation under it (previous photo), then fill the first layer of the mixture
We will cover the screed with plastic wrap to exclude extraneous effects on hardening. Periodically spray the surface, so reduce the fracture. We are waiting for a minimum of 14 days
For the subsequent pouring of the leveling screed, we install beacons in the rough floor - nails or self-tapping screws, the hats of which are set at the laser or normal level
According to the height of the exposed beacons, we arrange grooves from the solution, which will serve as guidelines for leveling the screed
Step 1: Laying the base plate insulation
Step 2: Fixing thermal insulation with tape
Step 3: Laying the reinforcing mesh for the screed
Step 4: Fastening the reinforcing mesh with knitting wire
Step 5: Pouring the first layer of cement screed
Step 6: Curing Process Break
Step 7: Install the beacons for further alignment
Step 8: Laying Furrows from the Solution
It is more convenient to fill the leveling screed from the far corner of the room, moving towards the exit:
Image Gallery
Photo from
Step 9: Fill the first sub-floor
Step 10: Completely fill the screed in the bathroom
Step 11: Second Technology Break
Step 12: Sealing Cracks and Holes after Hardening
The rough floor is ready. Now it can be finished with any kind of floor tile, porcelain stoneware, linoleum or just grinding the concrete base. It is important when laying the coating to leave a gap between the walls and the massif of the floor so that the movements of the wood do not damage it. The gap is closed with a plinth.
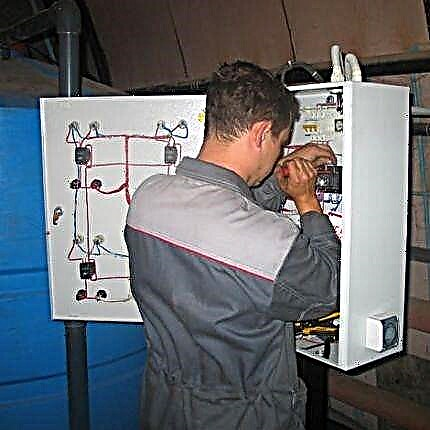
Features of the arrangement of the electrical network in the bathroom
To properly conduct wiring in the bathroom, you need to remember that high humidity does not affect wiring in the best way. In adverse conditions, open contacts quickly oxidize, and in the area of the joints increases the resistance and the degree of heating.
It’s not worth joking with this; the critical temperature often causes fires. It is important to lay the wiring in compliance with all regulatory requirements, connecting cables as securely as possible. The ends of the veins in the compounds are preferably covered with a layer of tin.

Often fires in wooden houses arise due to errors in the installation of electrical wires. You can’t save on it
Also, when drawing up a wiring diagram, do not forget that the house is wooden. And here you will need increased attention and additional protection of conductors.
The best option is to use metal pipes in which the wiring will be laid. The use of copper or steel pipes allows you to safely flush-mount in the bathroom.
Do not forget that electric points must be removed from taps and shower heads. And sockets must be chosen with a special protective cover - moisture-proof with IP44.
The specifics of the organization of electrical wiring in the bathroom is to protect the lighting and power lines from the possible effects of steam and water:
Image Gallery
Photo from
Vapor barrier on the ceiling
Entering electrical wiring in the bathroom
Laying power lines on fireproof surfaces
Cable holder in the bathroom
Panel ceiling lining
Power lines on a rigid partition
Gypsum plasterboard partitioning
Fixing the cable in drywall
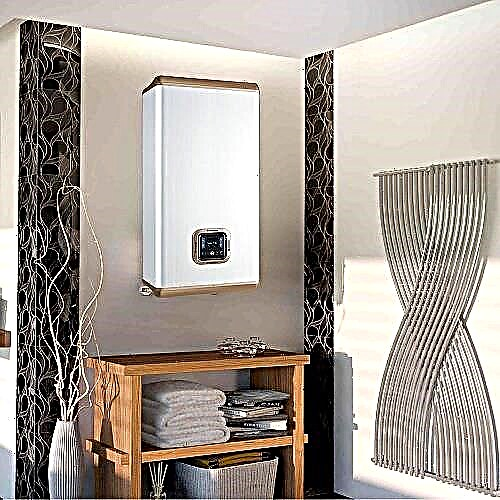
Ventilation device specifics
For any bathroom, air exchange is important, and in a wooden house, a proper ventilation system should be especially well organized.
It is important to ensure a full flow of air into the room, leaving a gap under the door. You can also put special grilles in the lower part of the door - they look beautiful and fulfill their main function of air supply.

For the bathroom of a wooden house, it is important to ensure the timely flow and removal of air. This will extend the life of the main structures
A ventilation duct is built to remove the exhaust air. It can be displayed in the attic of the house or laid under a false ceiling, if installed in the bathroom.
For safety reasons, ventilation ducts are equipped with fire dampers, flexible non-combustible materials, and a fan protected from fire. The power of the exhaust fan is selected based on the area of the room.
If in addition to the bathroom in a wooden house there is a sauna or a steam room, then it is also necessary to think over and organize ventilation there. The specifics of the steam room ventilation are described in detail in our article.

Reliable ventilation system in the bathroom will instantly remove humid air from the room
The rules for the design and design of the hood in a traditional bathroom are given in the article, which we recommend that you read.
How to make waterproofing?
Before you start finishing, you need to make waterproofing - an effective waterproof barrier for all parts of the room.
The main types of waterproofing materials
When choosing a material for waterproofing, you should focus on the type of finish that will be used in the bathroom.
To protect the wall structure from the harmful effects of moisture, use the following materials:
- Smear. They are able to create a resistant waterproof coating. These are mastics and emulsions, which are applied to the surface with a roller or brush in three layers with an interval of several days;
- Stickysold in rolls or sheets that are lapped. Seams are also treated with sealant or waterproof putty;
- Impregnating. They are used to process non-residential rooms due to the presence of various chemical additives in the composition.
Water-repellent properties are ensured by the presence of special additives in the materials that are safe for humans. So, for gluing sheet bituminous or polymeric materials, a special adhesive composition of hot or cold mastic is taken.

Processing materials with water-repellent properties will protect the tree from swelling and decay due to moisture
The procedure for waterproofing in the bathroom
Waterproofing material is applied only to a cleaned surface treated with primers with a deep penetrating effect.
In most cases, the floor is insulated with bituminous mastics, then glued with a waterproofing film, and a cement-sand screed reinforced with a reinforcing mesh and plasticizer is made on top. This technology is reliable and relatively inexpensive.

Cement screed smoothes and levels the surface of the floor, preparing it for finishing
For waterproofing walls, you can use one of the options:
- To process a surface with a layer of latex or acrylic waterproofing under drywall;
- Coat the walls with mastic before laying the tiles;
- Leave the wood surface as a finish, impregnating it with compounds with oil and varnish bases.
The surface of the ceiling must also be well lubricated with bituminous mastic in 2-3 layers, and then treated with an antiseptic protective mixture.

When waterproofing coatings, special attention should be paid to the so-called “wet” zones near the sinks and the bath itself
The rules for waterproofing a standard bathroom before tiling will be introduced by an article that we recommend reading.
Wall, floor and ceiling decoration
After a reliable waterproofing is ready and completely dry, the turn of finishing work comes. When choosing materials, you should consider the features of the room, which is located in a wooden house.
What floor to do in the bathroom?
The basis for finishing the floor will be a concrete screed, poured over the waterproofing layer. It should have a slight slope, due to which an emergency drain is equipped in the floor.

All materials purchased for finishing the bathroom must comply with the main requirement for any finishing material for a wooden house - moisture resistance. This is the first thing to look for when buying.
For floor finishing most often use:
- laminate;
- porcelain stoneware / ceramic tiles;
- linoleum;
- moisture resistant wood.
Elementary and far from the worst version of the cladding is ceramic tile. The wooden floor looks beautiful and organic in the bathroom. If you want to save money, you can do with linoleum.
Laying hard types of coatings on the floor in wooden houses is performed according to a floating scheme. That is, they do not fix rigidly to the base and between the walls of the building and the screed together with, for example, tiles laid on it, leave a gap of 1.5 - 2 cm.
Image Gallery
Photo from
According to the "floating technology" tiles are laid on the floor so that the edge of the coating is not connected with the wooden walls of the house. Wood is unstable, during shifts it can damage the floor by pulling it along. According to floating schemes, the gap between the coating and the screed or between the screed and the base must be additionally provided with a plastic layer
The floor tiles in the bathroom are laid out taking into account the plumbing placed in it. They try to place the whole, uncut tile in the center, under the ceiling lights
Cutting fragments of tiles used to fill the remaining space is done on the spot after the fact.Keep in mind that between the coating and the wall should remain a gap of 1-2 cm
The gap should be not only around the perimeter of the room, but also around all communications crossing the lower floor, as well as structural protrusions and recesses. The gap is filled with a strip of foamed polyethylene
Laying floor tiles in the bathroom
Rules for laying out a piece of coating
Cutting tile fragments
Perimeter clearance
A “floating floor” is necessary to compensate for the linear movements of wooden structures. From above, the gap is closed with a skirting board, which is fixed exclusively to the wall.
Features of wall decoration
When decorating the walls, you need to take into account the characteristic features of natural wood. Under the influence of moisture and temperature jumps, it shrinks and shrinks.
To avoid deformation of the surface, they are prepared for subsequent finishing by installing a crate and fixing a false wall from above. This design is erected from moisture-proof drywall or a sliding frame made of a metal profile in compliance with the ventilation gap.
Such preparation will allow you to perform almost any type of finish. But if it is planned to use wood for cladding, then there is no need to build false constructions.

Tiles in the bathroom can be combined with wood or special paint, creating beautiful combinations
Now the following decorative materials for walls in the bathroom are in demand:
- Wooden lining. It is polished and additionally processed with paints and varnishes. It is better that it was made of moisture-resistant teak or larch;
- Tile. It is presented in a huge assortment: smooth and embossed, plain, with ornament, large or mosaic. It is fastened with waterproof glue, and the seams are treated with a polyurethane elastic sealant;
- Wall panels. It can be plastic plates or aqua panels. Under them, a crate for ventilation gap is necessarily installed.
A variety of materials for finishing allows you to realize any design imagination. You can combine several types of materials, create color compositions, play with textures.

Tiling is the perfect solution for bathrooms. It is durable, not afraid of water and easy to care for.
Features of laying tiles in the bathrooms of wooden houses are presented in the following gallery:
Image Gallery
Photo from
Lining the internal partition
Laying tiles taking into account the relief of the log
Facing the angle of the ventilation shaft
Ceiling clearance for linear expansion
Those who wish to veneer ceramic walls with logs or beams will have much more work. To do this, first build a frame on the walls, allowing the decoration to move separately. A plasterboard base is arranged on the frame, tiles are laid on it.
Subtleties of arranging the ceiling
The ceilings of bathrooms located in private wooden houses are usually finished with suspended or suspended structures made of glossy PVC panels, moisture-proof drywall.
False ceilings are appreciated for numerous benefits. They are a powerful shield against humid air, under them it is easy to mask elements of the electrical and ventilation systems.
If the choice fell on drywall, then the profile for it should be treated with zinc and coated with additional corrosion protection. To keep the gypsum ceiling ceiling for longer its original attractiveness, it is glued over with glass wallpaper.

Tension, suspension and rack structures of the ceiling will allow to realize any ideas for lighting
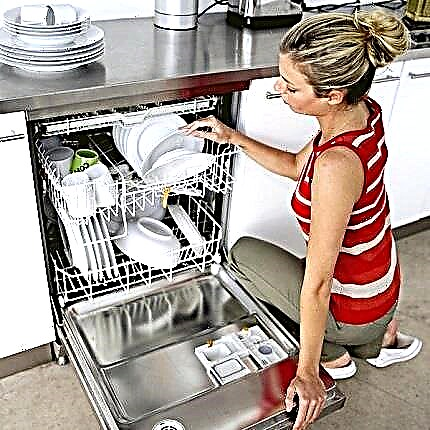
Selection and installation of plumbing
When all the most difficult work is behind, the moment of choosing and buying plumbing comes. In this matter, the size of the room, its location, the number of family members are taken into account.
The style of the room also matters. For each direction - country, art deco, provence or classic - you can choose the right plumbing equipment.
There are different models of bathtubs on the market:
- wooden;
- cast iron;
- steel;
- acrylic.
The option to purchase a cast-iron bath is better to discard immediately. It is unacceptable for a wooden house because of its impressive mass. Steel products that are suitable for small spaces are more practical.
For rooms decorated in eco-style, it makes sense to purchase an unusual wooden bathtub. The greatest variety of configurations differ in acrylic models. Among them, there will definitely be something that fits perfectly into a certain style of interior.

If the size of the room allows, you can install the bath in the center. For a wooden house, this arrangement is very convenient and practical. The walls in this case do not come in contact with water, which significantly extends the life of their finish
In combined bathrooms, it is desirable to separate the bath and toilet with partitions from plasterboard, wood, colored, frosted or mirror glass. Also in the room there should be conditional zones for swimming, rest, a sanitary zone.
Plumbing should be installed so that there is free space around it:
- bathtub - 100 cm;
- toilet bowl - 60-70 cm;
- a bedside table with opening doors - 50 cm;
- shower cabin - 90 cm;
- sink - 70 cm.
The distance between each type of equipment should be at least 20 cm. This will allow you to use each device without problems, without clinging sideways to the other.

In order to save space, it is recommended to purchase furniture of a corner installation, and replace the standard bathtub with a shower cabin
Choosing plumbing for small rooms should be very careful. In order not to further narrow the space visually, you can not install a toilet, sink and bathtub in dark colors. A profitable solution would be to introduce pastel shades, transparent shelves, and built-in furniture into the interior.
Video about decorating a bathroom with PVC panels:
How to prepare the floor for finishing: effective waterproofing methods:
Furnishing a bathroom in a wooden house seems a difficult and impossible task only at first glance. In fact, anyone can understand all the subtleties. The main thing is to take into account the characteristic features of natural wood and select high-quality moisture-resistant materials for decoration.
Tell us about how you equipped the bathroom in a house made of timber or logs. Share the nuances and subtleties of the process that may be useful to site visitors. Please leave comments in the block below, ask questions, publish photos on the topic of the article.